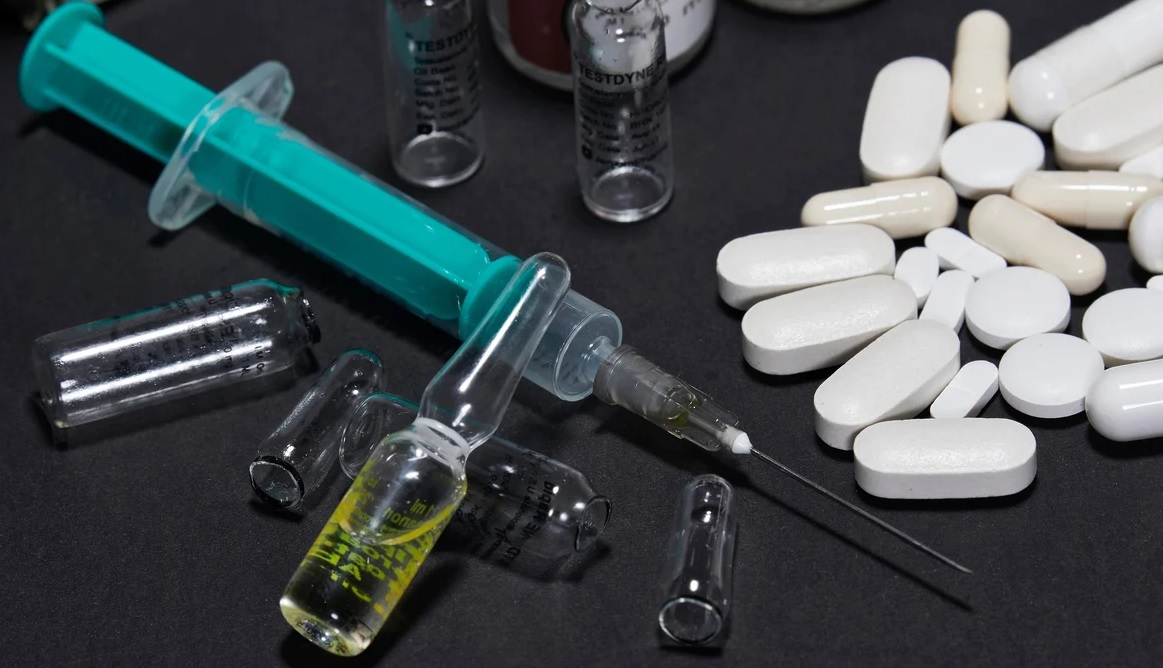
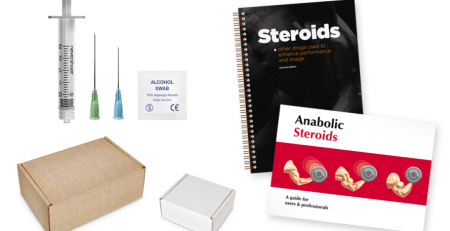
Injection Guide for Steroid Injections
When organizing the first steroid cycle, the proper injection technique is usually the final item on the list of considerations. When they come across a variety of vials, needles, and syringes, they stop to think about how they are going to get the chemicals out of the bottles and into their bodies. They will have considered their goal and looked into other drugs, stacking, and cycles. This is the moment when a lot of people begin to worry about injecting themselves. Patients are sometimes so nervous that they completely give up on the plan or opt for oral cycles, which leaves them severely unmet.
How not to inject steroids?
Users will ultimately ask questions about how to inject steroids on any discussion board. While many of the techniques under investigation seem ludicrous, one stands out in particular: intravenous steroid injection. I have to be very clear about this straight away: injecting anabolic steroids intravenously has some danger. While certain anabolic steroids can be injected directly into muscle tissue, the majority are intended to be given subcutaneously. This describes the fat just beneath the skin.
Prepare for injecting steroids
Learning how to get ready for an injection is the first step in injecting steroids, and it’s more complicated than you would think. Even though there are eight stages you need to follow while injecting, the complete process shouldn’t take longer than a minute. However, failure to adhere to these eight extremely simple steps might result in infections, painful injections, or an unneeded sore injection site.
Step 1: Selecting a Needle
Because there are so many various sizes available, you must use the right needle size to finish the work. Large needles are not necessary, but you also don’t want a too-small one because the oil would hardly get through. Generally, a 1″ length, 23–25g needle will work, but 1.5″ lengths are also available. Certain individuals discover that 12-inch needles work well, but only when injected into a body part with minimal body fat. Regardless of the needle size you choose, you will always insert a brand-new, sterile needle each time you inject something.
Step 2: Drawing Air
Although it simplifies the process, drawing and releasing air from the syringe is not required. To begin, suck up as much air as possible, a minimum equal to or greater than the volume of fluid you want to inject into the syringe. Drawing a little bit more air than is necessary is perfectly OK and might even speed up the process.
Third Step: Clear the Air
The following step involves inserting the needle into the oil and forcing all of the air drawn into the syringe out of it. Then, leaving the syringe in the fluid, proceed to the next step.
Step 4:
Pull out the Oil To obtain the required amount of fluid, just pull back the syringe’s plunger. Since you might lose some as you move on to Step 5, it is preferable to sketch a little bit more than you need. Many people occasionally choose to use a “Draw Needle,” which entails drawing up the fluid with a larger needle and injecting it with a smaller one. In this instance, using a 20g–21g needle to pull oil into the syringe is easier and faster. If you choose this method, go through steps two and three with your draw needle. After Step 4, the draw needle is changed using the injection needle you selected in Step 1.
Step 5: Remove Air Bubbles in
After the oil has been added to the syringe, gently press down on the plunger and tap the side of the syringe with your finger to remove any air bubbles. A little oil will come out of the needle since you drew up a bit more. Verify that the syringe has the right amount of fluid in it at this point.
Step 6: Cleaning up
Select the exact location and muscle that you want to inject into. Use an alcohol swab or alcohol on a cotton ball to clean the area. Although alcohol swabs are the best option, using cotton balls also works nicely.
Step 7: Aspirate after plunging the needle
Once the area has been cleaned, put the needle into the muscle without injecting it yet. Aspirating is the process of pulling the syringe back slightly after the needle is firmly inserted. You have hit a vein or blood vessel if blood fills the aspirating syringe; remove the needle and choose another location. One of the risks of injecting into a vein or blood vessel is developing “Tren Cough.” Although testosterone can also induce it, trenbolone is the most well-known anabolic steroid for this. Tren Cough is a violent cough that may be quite uncomfortable and frightening. It is brought on by a portion of the steroid getting into the lungs. It will taste metallic in your mouth, and some people even say they have tooth discomfort. Tren Cough should not worry you; if you aim high and follow our advice, you will be OK.
Step 8:
You are prepared to inject your steroid (s) if you have completed steps 1 through 7 and no blood entered the syringe during step 7. Simply depress the plunger to empty the syringe.
Injection after protocol
Sadly, a lot of people miss this crucial step, so even if you now know how to inject steroids, you still need to know what to do next. If you take a moment to complete this quick three-step procedure, it will make everything run more smoothly.
Step 1: To make sure the oil has fully absorbed into the muscle, leave the needle in place for 20 to 30 seconds after injecting all of the oil. If this phase is skipped, there’s a significant likelihood that some of the oil may leak or, worse, that it could settle beneath the skin and result in a sterile abscess that is extremely painful.
Step 2: You are now able to remove the needle. As you proceed, place a fresh, clean cotton ball over the injection site. For twenty to thirty seconds, apply light pressure while holding the cotton ball in place. You are doing this because there’s a strong chance that the cotton ball will have some blood on it, but don’t be afraid.
Step 3: Once the cotton ball has been removed, massage the area firmly for a short period to ensure that all of the oil has been absorbed deeply into the muscle. Right now, you’re done.


Leave a Reply